

DIY apparel
Bright wardrobe items make not only adults smile, but also kids. Children simply love to wear things with various beautiful applications, especially when they choose a drawing for themselves. But today there are many special devices, materials and tools that allow you to independently produce wonderful drawings and compositions. Applique on clothes with their own hands can be performed even by a child, mother will only have to help him a little. In this article we will look at how to create beautiful applications on your own and what is required for this.
to contents ↑What is an application?
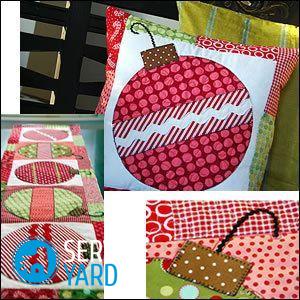
This word is of French origin and literally translates as “attach”. Simply put, this is an art associated with attaching pieces of fabric to the base to create an invented picture. But we are all familiar with applications since childhood, only then we made them from paper and natural materials.
Applique for children’s clothing with their own hands is more often performed from shreds of fabric, pieces of leather or felt, ribbons, crocheted items, ribbons, buttons, beads and beads. The elements selected for work are attached to the fabric by gluing or sewing.
to contents ↑Varieties of modern decorative applications
Now we will find out how varied, bright and completely unlike each other applications can be, which are then transferred to clothes and create unique, original and stylish compositions.
Traditional appliqués
For such applications, traditional materials are used, that is, pieces of fabric that are sewn manually or using a sewing machine to clothes. But they do not immediately begin to be attached to the base:
- First, all the elements are laid out and temporarily fastened with safety pins in order to preliminarily evaluate how the composition will look.
- Only then can we begin to process the edges of each part in turn. To do this, the edges are bent inward, and the part is mounted invisibly by a seam directly along the edge.
Important! It should be noted that seam allowances should be left only in the case of manual processing. If you sew on a typewriter, then the edges of the elements are processed with a zigzag seam, and therefore no allowances are required.
Naturally, the machine greatly facilitates the work, but if the child will participate in the process, then, of course, it is better to do everything manually.
Two-layer applications
This application option is ideal for simple patterns that are made in the form of various geometric shapes. Everything is very simple here:
- First, two completely identical parts of all fragments are cut out.
- Then, from the inside, they are applied to each other and hedged, while a small hole is necessarily left un sewn.
- Details are turned on the front side and sewn to the base.
Important! In order for the details to turn out to be voluminous, you need to choose dense materials for the blanks on the back side. Thus, you can make an application on a children's coat.
Reverse applications
This option is only suitable for the manufacture of applications in which the base is made of non-bulk materials:
- First, select the picture.
- Then we transfer it to a napkin, carefully cut out the template.
- After finishing work, we remove the napkin, and from the wrong side we sweep the material for the application so that it does not move during sewing.
- Now we begin the lining of the seam according to the contour of the finished template.
- Once the seam is ready, you can remove the basting.
- Cut out the contours of the image on the basis of the front side, while backing off 2 millimeters from the seam.
Important! Everything must be done as carefully as possible so as not to damage the application.
Glued appliqués
This is ideal for people who do not like to sew. To attach the application you will need:
- special glue for fabric or iron;
- the material, which is often called the "cobweb" - it has one unique property, namely, it begins to melt when heated.
To create a picture:
- All elements of the composition are placed on the web.
- Then they are placed in the right place and gently ironed from above with a heated iron.
- The remaining edges of the web are simply deleted.
Important! It is advisable to play it safe a bit, and to prevent the application from peeling off along the contour, make some invisible stitches.
Volume applications
Often needlewomen use voluminous applications to give things even more decorative. It differs from the traditional version in that a little material is put under each part to create a stuffing effect, and you can use synthetic fluff or synthetic winterizer for this.
to contents ↑Important! Works that combine volumetric applications with details decorated with other techniques, for example, decorated with ribbons, crocheted or woven from beads, simply look wonderful.
Useful tips and advice from masters
If you decide to create appliqués for children on clothes with your own hands, be sure to follow the advice of experts in this matter, and then you will not have any problems during the work:
- Before you begin to make an application, the selected fabric must be properly prepared, that is, thoroughly washed and ironed.
Important! Materials such as chintz and satin are also recommended to starch. And lace, synthetics and cambric need to be processed with a solution made on the basis of gelatin.
- When choosing threads for processing edges, it is better to give preference to contrasting shades so that the finished elements look more decorative and bright.
- Do-it-yourself applications for clothes are created not only in order to decorate any thing. Often they simply extend the life of their favorite clothes, because children often tear and spoil things, and with the help of a beautiful picture you can cover a stain or hole.
- If you plan to completely make the application by hand, then in advance buy a few sharp thin needles and always scissors with the thinnest blade. Without such tools it is impossible to make a neat application.
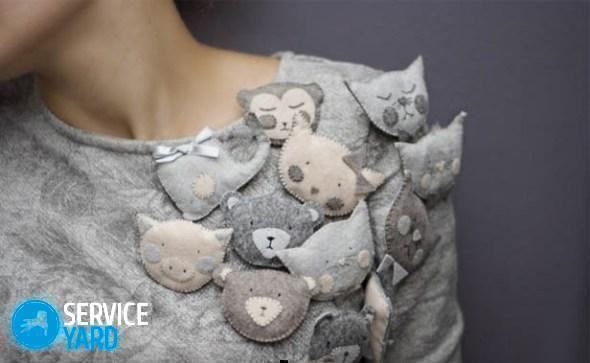
- If, besides felt, at your fingertips you no longer have other materials for work, but you know that it will certainly shed, then you can make it an original element of decor. You just need to attach to the clothes as a brooch, which can be easily removed during washing.
- The application can be decorated with additional details so that it plays with new colors and takes on a finished look.
How to make your own simple children's applications?
Using two simple applications as an example, we will examine in detail how the process of their manufacture looks and what usually needs to be prepared for this.
Making an elephant applique
Now we will learn how to make an application for a children's coat in the form of a small elephant.
For work, we need:
- two types of material;
- tracing paper;
- adhesive non-woven;
- scissors;
- pencil;
- ready-made template;
- Iron and sewing supplies.
The step-by-step production of this application looks like this:
- On the non-woven translate the finished drawing.
- We cut out the elements from non-woven fabric and make small allowances.
- We put all the details on the wrong side down with the adhesive base, then iron the top with a preheated iron.
- Now we cut out the elements of the application strictly along the contour, while they will already consist of fabric and non-woven fabric.
- Peel off the paper from the wrong side.
- We lay out the details on the coat face up, iron again.
- To fix the picture, on a typewriter or manually flash it along its contour with a zigzag stitch.
Everything, our application is ready!
DIY clover applique
Clover is not only beautiful in itself, but also symbolizes the fulfillment of desires and good luck.
First, prepare:
- clover pattern;
- paper;
- material you like;
- basis;
- scissors;
- sewing supplies;
- pencil;
- an iron and a few buttons.
The manufacturing process of this application consists of several stages:
- We print out a template on a regular sheet, cut out the figure along the contour.
- We transfer the pattern to the fabric - we get the main element of our application.
- Using transfer paper, glue it on clothes and iron it.
- We complete the decoration with a contrast button.
The work is over!
to contents ↑Stock footage
As we see, there is nothing difficult in this work, the main thing is to have a desire and clearly follow the instructions. Having studied this decoration technique, you can regularly please your child with the appearance of interesting pictures on his clothes and extend the life of seemingly spoiled things.
- How to choose a vacuum cleaner taking into account the characteristics of the house and coatings?
- What to look for when choosing a water delivery
- How to quickly create comfort at home - tips for housewives
- How to choose the perfect TV - useful tips
- What to look for when choosing blinds
- What should be running shoes?
- What useful things can you buy in a hardware store
- Iphone 11 pro max review
- Than iPhone is better than Android smartphones
 (No ratings yet)