How to seal a leather jacket at home?

Leather jackets are an integral part of any person’s wardrobe. They are very practical and durable. But nevertheless, sometimes absurdity happens - you hooked on a carnation or awkwardly put your hand in your pocket, and the question arises - how to glue a leather jacket at home? Of course, numerous ateliers offer various clothing repair services. But if this option seems too costly to you, then we propose to cope with the problem on your own, especially since it is not very difficult.
to contents ↑What will be needed to repair a leather jacket?
Prepare the necessary materials and tools:
- Adhesive for working with leather and fabric. Use “Moment” or any glue for shoes. About which composition is better and suitable for you at a price, read in our special article "The best glue for shoes".
Important! You can not use PVA and super-glue.
- Piece of thin skin or suede. Pick the material in the same color as your favorite item. The size of the patch should be more than a torn place or cut by 2 centimeters on each side.
Important! If the hole or cut is small, put on the patch a old leather or suede glove.
- Sharp small scissors.
- Solvent for degreasing.
- Hard brush.
- A pair of toothpicks.
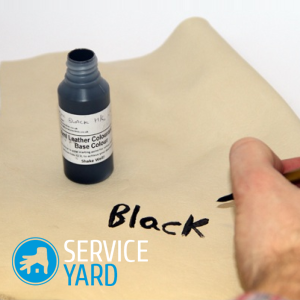
- Paint and cream skin paint.
to contents ↑Important! You may need a heavy object to pin down the place to be glued while you are dealing with the problem of how to seal a leather jacket. All work is best done in a well-lit and, preferably, ventilated place.
How does skin break on a jacket?
The most common types of damage are:
- Gap “corner”
- Torn off a piece of skin.
Important! The methods for closing the gap in each of these situations will be different. Read them carefully so that the result of the problem is how to stick a leather jacket at homewas very high quality.

Step-by-step instructions for repairing a leather jacket - situation No. 1
If you have torn the material with a corner, then follow the following procedure to fix a leather jacket.
Step 1
- Turn the leather jacket inside out.
- On the lining of one of the sleeves, find the seam that is sealed outward and rasp it.
- Lay the jacket on a flat, well-lit surface (such as a kitchen table).
- Putting your hand inside, get to the rupture from the wrong side.
Step 2
The torn place is well treated with a solvent to degrease.
Step 3
Prepare a piece of leather or a fabric patch. The size of the patch should be larger than the gap by 1.5-2 cm on each side.
Step 4
- Glue the surface of the patch.
- Walk with a brush or cotton swab with glue around the gap.
- Do not slip the gap.
- Let the glue dry for 20-30 minutes (see the instructions for use of the glue).
Step 5
- Apply another thin layer of glue.
- Wait until it dries.
Step 6
- Glue one side of the gap carefully.
- Align the edges and glue the patch to the cut completely.
- Press the junction of the torn area well.
Important! The smoother the joint, the less visible the seam.

Step 7
- Turn out a jacket.
- Bend the skin along the tear line so that the junction of the edges diverges.
- With the tip of a toothpick, gently apply a little glue between the edges of the gap.
- Slide them closer.
Step 8
- Line the jacket on the table.
- Press down the place to be glued with the load for a day.
Step 9
If necessary, tint the gluing line with a cream color of a suitable color.
Step 10
Sew the lining.
to contents ↑Important! If the seam is still noticeable, but the jacket is already whole, you can additionally decorate this place and several more sections of the product, thereby giving the original design of the thing. Choose the option that is more convenient and interesting for you from the point of view of decorative design from those proposed in our separate publication "How to decorate a jacket?".
Step-by-step instructions for repairing a leather jacket - situation No. 2
If you pulled out a piece of leather, then follow the instructions below to easily glue a leather jacket at home with your own hands.
Important! For work, you will need, in addition to the above funds, tape and tweezers.
Your actions:
- With tweezers, carefully insert the torn piece into the hole and glue it with tape.
- Turn the jacket inside out and get to the place of the gap from the wrong side, as in the previous case (steps 1, 2, 3).
- Glue the prepared piece of fabric not on the joint, but on a piece of leather.
- Until the fabric is stuck, it can be moved, so gently twist the jacket and remove the tape. Using your fingers, adjust the patch, hold it, and leave to dry.
- Sew the lining.
Important! If you did everything right, then the gap will be completely invisible.
Important! If you were unable to glue the jacket carefully, find out how to remove glue from clothes, and not just leather.

Helpful hints:
- Before using adhesive tape, make sure that it is sticky on a piece of skin that is not visible. Most things are currently stained with special films. In this situation, you can not stick a leather jacket, but remove the surface layer of the dye.
- Make sure that you remember the instructions before work well, because during work you should be focused on the goal and not be distracted.
- The glue should not dry before you repair the gap, as it will be difficult to apply a second layer of glue, and the quality of the joint will deteriorate.
- To sew the lining, use a needle designed to sew leather. Otherwise, you may damage both the machine and your clothes.
- If you are embarrassed that the patch will be visible, then use a design solution - sew a couple more pieces of leather over the entire surface.
- If during operation the glue got out of the hole, then carefully remove their traces with a dry rag. In no case should the material be wetted.
- Before work, pre-check that the glue, adhesive tape did not leave marks on the material, and the paint perfectly matches the color of your product.
to contents ↑Important! In the future, carefully take care of the product so that you do not have to spend money on a new thing. Our tips will help you with this. how to clean a leather jacket.
Stock footage
As you can see, the situation with the spoiled thing is not pleasant, but it can be solved. Carefully read all the tips and instructions and this will help you repair your favorite wardrobe quickly and efficiently.
 (No ratings yet)