

DIY mink coat repair
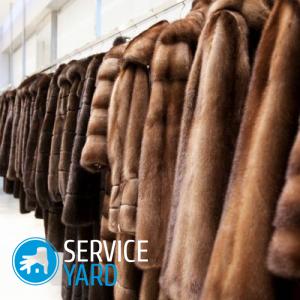
Incorrect storage, as well as bends or abrasions of the pile often spoil not only the appearance of the fur product, but also knock its owner out of a rut. The only consolation is the fact that such defects have the opportunity to fix on their own. From this article you will learn how to repair a mink coat and how to restore it with your own hands.
to contents ↑How to eliminate open sutures under the arm (photo and video)?
At home, such sewing repair work is carried out manually - with an overcast seam or a goat seam.
Important! In no case can you use an ordinary lower case machine - it pulls the natural fur during operation and damages the skins.
For easier and better work, the diverged seam must be glued with a special contact tape (without heat treatment) and stitched with a sewn seam.
to contents ↑We put a patch
In order to eliminate a hole or restore a gap, it is necessary to pick up a piece of fur with the same pile as in the damaged area.
Important! For the patch, you can take the part cut from the belt, side seam or collar.
To sew a mink coat with your own hands, you must follow the following algorithm:
- Using a blade or a tailor's (stationery) knife, carefully cut the edges of the damaged area, giving it the desired shape.
Important! When working with fur, you can not use scissors - they cut off the pile.
- Carefully catch the patch, trying not to stretch the fur.
- Finally sew the patch with an overcast seam.
- In the final stage, the repair site should be slightly tapped with a wooden hammer through a thin cloth or paper - this is necessary in order to even the fur.
Eliminate scuffs
You can eliminate small scuffs in the folds by removing them in the inner seam. To do this, you must follow this algorithm:
- Unfasten the lower lining and the seams that fix the fit.
- Carefully sweep the bald spot.
- Duplicate using cold contact tape.
- Cut the damaged area with a blade or knife.
- Next, you need to flash the edge together with the contact tape, using the overcast seam.
- Unscrew the fur product, tap on the seam through fabric or paper.
- Sew the lining to its original place.
How to replace the lining?
To repair the fur coat by replacing the lining, you must contact the master.
to contents ↑Important! The lining fabric for a fur coat must be selected from viscose or natural materials so that the fur can breathe. After consulting with the master, you can add or remove insulation.
Sealing up fur coats
Even a hole in a fur product can be repaired.
Materials for work
In order to restore your favorite fur coat, you need to stock up on the following materials:
- Threads in a suitable color.
- A set of needles.
- Bandage.
- Glue for a fur coat.
Working process
If your fur coat was torn at the seam, then this option will be the most painless and not scary. It is simple enough to neatly, but at the same time, securely sew up the damaged place where the fur coat was torn.
Important! In this case, it is necessary to flash the seam twice, and fix the threads of the first seam so as to prevent further spread of the hole in the seam.
If the skin itself is torn, then you have to glue it.The choice is left to the owner of the fur coat - he can either glue it with his own hands, or take the fur product to the atelier for the specialist to do.
Important! It is necessary to immediately determine the place of restoration, because the fur product will have to be there for several days in order to dry well, while not changing its original position. The ideal option is a dry and sunny place where the fur coat can be easily placed horizontally without twisting it.
Do-it-yourself repair of a fur product is as follows:
- First of all, it is necessary to attach the torn edges of the fur to each other as accurately as possible.
Important! Be careful as much as possible! Otherwise - not even a noticeable distortion may affect the appearance of the repaired product.
- Next, you need to carefully sew the pieces of the torn skin to each other. Try to do this as carefully as possible while using a thin needle so that damaged skins do not continue to burst.
- After that, it is worth preparing the glue for further work. Adhesive “Moment” is like no other suitable for this procedure, however, you can use any other adhesive composition you like.
- Cut off a piece of bandage - it should be slightly larger than the seam at the place of fastening of the two skins. Next, it is necessary to impregnate the cut piece of the bandage with glue and attach it to the seam.
- Leave the fur product to dry.
to contents ↑Important! During drying, do not fiddle, change the position of the fur coat, hang it in the closet. It will be much better if you leave the coat in the position in which it was during the repair.
Stock footage
A fur coat is a symbol of beauty and femininity, but it happens that this luxurious fur product can be damaged in some way. From this article you learned how to repair a mink coat at home, which means that now you do not need to contact a studio for professional repair.
- How to choose a vacuum cleaner taking into account the characteristics of the house and coatings?
- What to look for when choosing a water delivery
- How to quickly create comfort at home - tips for housewives
- How to choose the perfect TV - useful tips
- What to look for when choosing blinds
- What should be running shoes?
- What useful things can you buy in a hardware store
- Iphone 11 pro max review
- Than iPhone is better than Android smartphones
 (No ratings yet)