

How to update the countertop in the kitchen with your own hands?
Every housewife dreams that the kitchen always has an attractive look. However, over time, pieces of furniture wear out, especially the table and tabletop, as they are used most often. In addition, the countertop is also subject to mechanical stress in the form of a hammer for chops or a knife blade for vegetables and fish. If the set still looks great, then the question of how to update the countertop in the kitchen with your own hands is just as relevant. If you approach the matter with imagination and do everything carefully, the new decoration of the cutting surface will give the kitchen interior an original, unique and respectable look, and as a bonus - cost savings on the purchase of a new countertop.
to contents ↑How to update the countertop with your own hands: the most creative ideas
For those who are not ready to update the interior of the kitchen in a radical way, we suggest transforming one of the furniture elements in the following ways.
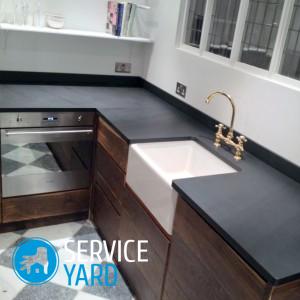
Paint and glass
A painted tabletop with glass always looks very rich and respectable. And this is one of the most popular ideas on how to update the countertop in the kitchen with your own hands.
Important! The three-dimensional effect will directly depend on the thickness of the glass - the larger it is, the countertop will look deeper.
Step-by-step instruction:
- Clean the worn cutting surface from exfoliated fragments, chips. You can use for this purpose a belt sander or sandpaper.
- Drain and degrease the treated surface.
- Paint over. You can approach the matter with imagination and apply a drawing. You can paint the surface using stencils or make a drawing yourself.
- Let the countertop dry.
- Fasten a sheet of tempered glass to the surface.
Advantages of a glass countertop:
- Does not absorb food odors.
- Not afraid of high temperatures.
- Not afraid of moisture.
- Wide color palette.
- Refined and respectable look.
- Strength.
- Not afraid of random punches.
Disadvantages:
- Requires special care.
- The countertop should not be in close proximity to the hob.
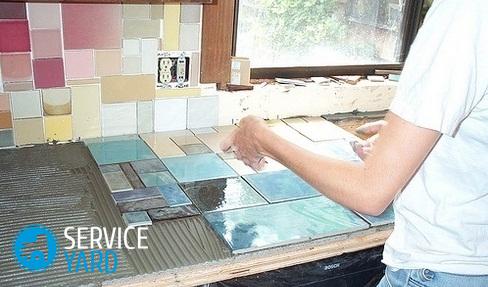
Tile Decoration
You can update the cutting surface with the help of ordinary ceramic tiles. Such a decor can be done by anyone.
For facing suitable:
- Ceramic tile.
- Composite tile.
- Mosaic.
- Stacked mosaic tiles, which is characterized by a variety of colors.
Important! To simplify your process and achieve a better aesthetic effect, follow these recommendations:
- Use the same tile as the apron above the work area to decorate the surface. It will look very original.
- The pattern on the surface will be very beautiful if you combine the tile in size and shade.
- If you will use a mosaic, then get it in the form of a large tile. This will greatly speed up and facilitate the decoration process.
- The combination of tiles and mosaics looks beautiful.
For work you will need:
- Tile.
- Glue for a tile.
- Plastic crosses to align the seams.
- Grout for joints.
Finishing Instruction:
- Wash and dry the countertop.
- Using a grater, apply glue to the surface.
- Evenly distribute the glue and form grooves for more effective gluing of tiles.
- Lay the selected tile on the adhesive layer.
- Press it down and carefully level it.
- Align all the seams between the laid tiles in width using plastic crosses.
- Wait until the glue has completely dried and grout the seams.
- At the ends of the countertops, install the profile and fix it with tile glue.
Important! To securely fasten the profile, use clamps when fixing.
Advantages of decorating with tiles:
- The tile easily transfers intensive operation.
- Moisture resistant.
- Not afraid of the use of chemicals.
- Simplicity of execution.
- Subsequent surface repair consists in replacing the damaged tile with a new one.
Decoupage
The old element of furniture can be changed beyond recognition if you approach the matter creatively. A huge plus of decoupage is that it does not limit imagination, and besides, decorating the surface does not require special skills. Anyone can cope with such a finish with a minimum of tools.
Important! Decoupage technique is suitable for dining tables and tabletop windowsills. The surface of the working surface is often subjected to intensive use, so the decoupage technique is not suitable for it.
Tools and materials
To update the countertop in the kitchen with your own hands using the decoupage technique, you will need:
- Sandpaper of varying degrees of graininess.
- Artificial or artistic brushes are flat.
- Scissors.
- Matte or semi-matt varnish for wood.
- Napkins for decoupage or finished pictures.
- PVA glue or special decoupage glue.
Important! To decorate the table, get ready-made pictures for decoupage. They are sold in any store for creativity. If you do not want to buy pictures, then any motifs cut from paper napkins will do. You can use pictures from magazines or books.
Work Stages:
- Sand the old countertop.
- Wash, dry and degrease the surface thoroughly.
- Dilute glue in a ratio of 1: 1.
- Mark up on the table, lightly marking with a pencil the location of the pictures.
- In the container with water, put the cut out image, face down.
- After half a minute, put the wet picture on a plastic file, face down. All excess paper layers will roll.
- Apply glue to the picture.
- Glue the selected motif to the countertop. Do not clean the file. Smooth the image through the file.
- Let the countertop dry completely.
- Dry the surface with varnish.
- After drying the first coat of varnish, apply a second coat.
Important! So that you can update the countertop in the kitchen with your own hands and keep the effect for a long time, consider these recommendations:
- To prevent a new decoration from being washed during wet cleaning, varnish the surface 3-4 times. For convenience, purchase spray varnish.
- The surface around the pictures, for greater originality and originality, can be decorated with bright paint.
- At the final stage - cover the surface with acrylic varnish.
Screen painting
The technique of screen painting is as follows:
- Find on the Internet a suitable motive for painting.
- Print the picture.
- Cut the stencil out of thick cardboard.
- Worktop thoroughly clean and degrease.
- Paint the surface in a basic tone.
- Attach a stencil.
- Apply paint with a sponge, gently wetting the stencil.
For work you need a minimum of materials:
- Brush
- Acrylic paint.
- Foam sponge.
Important! So that the obtained effect does not disappoint you, take yourself a few secrets of doing such work:
- Apply a little paint on the sponge, otherwise it will leak under the stencil.
- An interesting way of decorating is painting through tulle according to the principle of stencil. Lay out a beautiful lace tulle instead of a stencil and sponge paint the surface through the fabric.
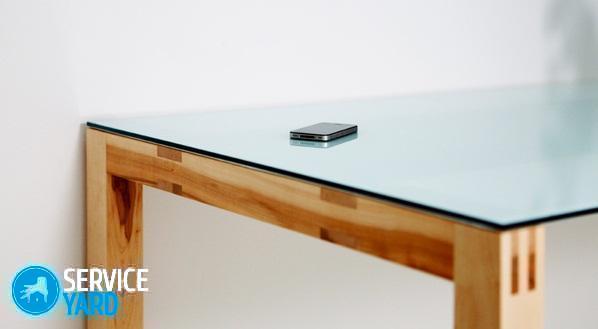
Volumetric countertop with various filler
If you decide to more thoroughly approach the issue of how to update the countertop in the kitchen with your own hands, make it very original and you have some experience in repair work, you will definitely like this method.
Materials
To update the interior you will need:
- Wooden slats.
- Glass.
- Fillers: dry spices, acorns, shells, pumpkin seeds, etc. At your choice and taste.
Technology
Make a volumetric countertop like this:
- Divide the countertop into sectors using a rail.
- On top of the countertop, glue the slats on the rib to get square drawers. It is better to use a finished finished rail or lining.
- Place the filler in the resulting cells.
- Put the glass on top.
- Fasten glass or glue.
- The original table is ready.
Important! A similar decor is suitable for the dining area, and for the coffee table.
In the article, we did not describe fast and budgetary methods: painting, pasting a self-adhesive film, updating a wooden surface by burning. All these methods have the right to exist and apply. Use them if you wish.
to contents ↑How to change the countertop in the kitchen with your own hands?
A radical way to upgrade is to replace the countertops with a new one. It is not difficult to make a reliable, beautiful cutting surface on your own. First of all, you need to choose a material.
What should be the result?
The main requirements that apply to the work surface:
- Strength. The panel must be highly resistant to mechanical shock, abrasion.
- Heat resistance. This is a very important indicator, since any hot dishes should not melt the surface and change its texture and texture.
- Moisture resistance. There is always water in the kitchen, so the surface must be highly resistant to any liquid.
- Hygiene The working surface should be easy to clean, not absorb odors and not affect the products. Release of harmful substances is simply unacceptable during cooking.
- Decorativeness. The appearance of the work surface plays a significant role in the arrangement of the interior. Choose a shade to finish the countertops so that it harmonizes with the overall style of the kitchen or vice versa - creates a vivid contrast.
To choose the right material for the work surface, get acquainted with their advantages and disadvantages.
Materials - Options
A new worktop can be made from:
- Chipboard.
- Fiberboard.
- MDF
- Composite material.
- Solid wood.
As a coating material, you can use:
- The tile.
- Granite or marble coating.
- Self-adhesive paper.
We hope that you have easily decided on the material and are ready to start the full replacement of the countertops in the kitchen with your own hands. Self-replacement of the work surface is carried out without much difficulty.
Important! Just note that to cut holes for the sink, faucets or hob on materials such as stone, solid wood or glass, you need a specialist. Similar services are provided by furniture manufacturers.
To make it easier for you to work on replacing the countertops, we have divided the whole process into stages.
Preparatory stage for replacing the countertop:
- Disconnect and remove all appliances on the work surface.
- Disconnect all communications and remove the sink.
- Prepare all the necessary tools:
- Drill and drill suitable for the selected material.
- Jigsaw and file.
- Fine-grained sandpaper.
- Pencil, marker.
- Square, tape measure, pattern.
- Putty knife.
- Sanitary sealant.
Dismantling the old structure:
- Remove all fixing screws and carefully disassemble the old countertop.
- Fold all fasteners neatly: corners, screws, etc., as they can come in handy in future work.
- Remove all drawers and carefully inspect the pedestal mounts.
- Tighten all bolts and nuts if necessary.
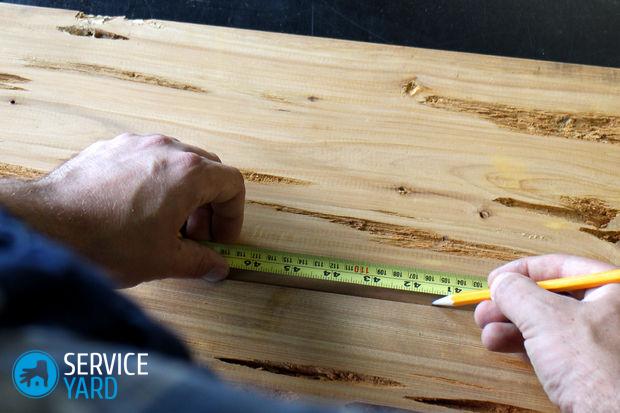
We make measurements
To determine the parameters for a new countertop:
- Alternately lay the two-meter level on the front and rear edge of a row of nightstands (there should be no clearance).
- For best results, tighten the adjustable legs and fix the cabinets in this position between each other, using screws or clamps.
- Take measurements. To do this, measure the distance from one edge of the headset to the other. Leave 30-50 mm on the side ledges.
Making a new countertop
The lid can be made by yourself or contact a specialized company. If you decide to cut everything yourself, then use a circular or circular saw to do this, since working with a hacksaw and a jigsaw will take much longer.
Proceed as follows:
- Apply, on the prepared material, with a pencil, marks along the length and width. If the marks made with a pencil or marker are barely noticeable, then use masking tape for this purpose.
- Mark up under the sink, mixer, hob, etc. Before marking, read the instructions that came with these items. The instructions usually indicate the dimensions for the installation of a particular household appliance.
- Carefully recheck the layout of all future openings and openings. There will be no return stroke.
- Drill small holes in the corners of the opening. Make sure that the drill does not go beyond the rectangle (square).
- Apply masking tape around the perimeter, which will protect the surface from the sole of the jigsaw.
- Fasten the cut line along with tape so that a single piece of material does not fall out.
Installation of construction:
- Put the workpiece in place. If the countertop consists of several elements, for example, for an angular set, then grease the side edges with sealant and tightly connect (for stone products use a sealer). After hardening, sand the joint and polish it.
- Secure the plate with the removed bolts. Use the new clips if you wish. The stone product is not fastened in any way, because due to its own weight it will lie stably on the pedestals.
- Seal part of the sheet adjacent to the wall with sealant.
- Apply moisture-proof sealant to the side edges and 10–20 mm around the perimeter of the equipment hole.
- Insert household appliances into the prepared openings. For washing, use the rubber cord that is included with some models.
- Using an iron, glue the edge bands onto the sides of the countertop.
- If one edge of the section is adjacent to the plate, then protect the edge with a metal plate so that the tape does not deform from high temperatures.
- Connect all communications and check their correct operation.
- Thoroughly clean the surface of the new countertop and begin operation.
to contents ↑Stock footage
As you can see, the process of replacing countertops in the kitchen with your own hands does not take much time. But a lot of it goes to the preparation of holes, drilling and edge processing. Therefore, if you do not have free time to carry out calculations and do not have the necessary tools, then when buying a finished tabletop, indicate the dimensions of the openings for household appliances - specialists will cut them using special high-precision equipment. You just have to install a new interior item and connect communications. In any case, thanks to the new countertop, the kitchen will acquire a touch of originality and exclusivity and you will be satisfied with the result.
- How to choose a vacuum cleaner taking into account the characteristics of the house and coatings?
- What to look for when choosing a water delivery
- How to quickly create comfort at home - tips for housewives
- How to choose the perfect TV - useful tips
- What to look for when choosing blinds
- What should be running shoes?
- What useful things can you buy in a hardware store
- Iphone 11 pro max review
- Than iPhone is better than Android smartphones
 (No ratings yet)