

How to make a panel of photos with your own hands on the wall?
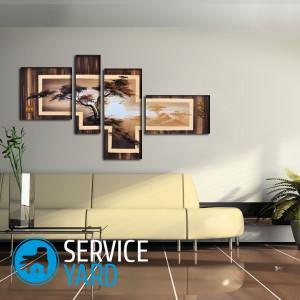
A modern wall panel is very often the merit of the whole family, when all the household members work on a beautiful decoration. Today, such options are in fashion when there are beautiful works in the interior that are created by collective work. But you can’t start even from a too large-scale event - first try to figure out how to make a panel of photos with your own hands on the wall in an art style close to you.
to contents ↑What are the panels?
Pictures on the wall can vary in the following parameters:
- Material that can serve anything: fabrics and plastic, cardboard and wood, wire and paper, fur and buttons, yarn and dry branches, photographs and postcards, fragments of mirrors and more.
- Technique: wood carving, embroidery, embossing, knitting, inlay and gluing. At the same time, the decorative element can be an interweaving of geometric shapes and lines, have a certain plot or abstract image.
- A shape that can be of any geometry and size. DIY paintings and panels can be made in the form of polygons, ovals, curved shapes, often consist of many separate elements.
- The 3D effect is a new trend in the creation of such compositions. This version of the panel is quite difficult to make, but quite real. In this case, a three-dimensional effect is achieved with the help of various protrusions, volume paper applications. Applications can imitate high relief, bas-relief and unique different works.
Important! “Soft” patterned volumetric panels created with the help of small wallpaper nails that are equipped with decorative hats look great.
- Lighting - it makes a panel not only an element of decor, but is also able to give it a practical property. For example, LED backlight allows you to use the panel, like a night lamp. The lighting level can be controlled by the number of LED elements.
Choosing a place for decor
Before you make a beautiful mural on the wall with your own hands, you need to determine its location. The shape, size and color scheme of the future canvas may depend on this:
- The distance from the panel to the floor surface is usually 170 cm.
- If you are going to make a mirror panel, then it should be installed so that natural or artificial lighting falls on the surface of the picture. Thus, the reflected and scattered light can create a visual harmony in the room.
to contents ↑Important! A wall panel made of corks, cardboard and other improvised materials looks great in free space. For this reason, to place this decor near other interior items, for example, shelves, paintings and photographs, is undesirable.
Preparatory work
There are a huge number of options to make a wall panel with your own hands for absolutely any room. Photos of finished products can be found in catalogs or come up with your own project. To begin with, it is advisable to put the planned drawing of the panel on the prepared sheet of paper. With this sketch, it will be easier for you to determine the future shape, size of the painting and the materials that you will need in the process of creating it.
Idea 1
If you are going to use fabric as decoration, then you can, as a basis, take a piece of board, plastic or any other material that has a hard surface. The fabric should be pulled onto the base, and its allowances should be secured from the wrong side of the workpiece. The finished artwork is set in a frame, and then hung on the wall.
Idea 2
Also, the panel can be made without a frame. To do this, you need a piece of plywood or drywall. The front part of the workpiece is glued over with synthetic winterizer or foam rubber, and then the resulting “pillow” is covered with fabric. Next, the product is decorated.
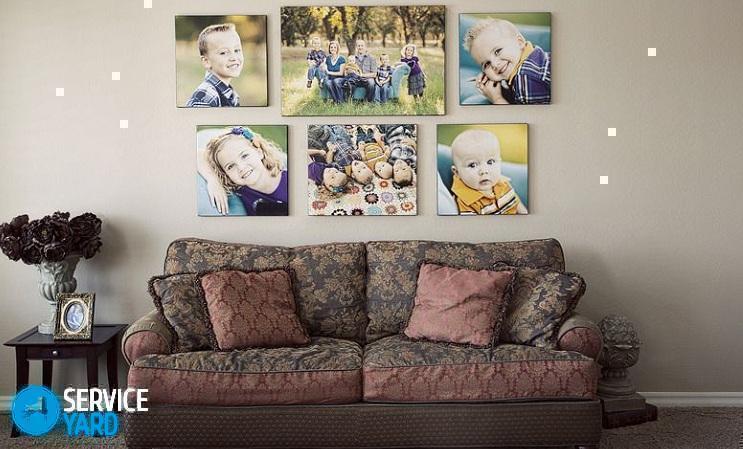
to contents ↑Photopanel
Making a beautiful mural on a wall with your own hands is very easy if you have a lot of interesting photographs in your family album. This type of decor can perfectly decorate any room: corridor, children's room, living room. Such pictures in the heart-shaped bedroom look very original.
Materials and tools:
- A piece of thick cardboard in white.
- PVA glue.
- A simple pencil.
- Stationery knife and scissors.
- A set of photographs.
Sequencing:
- Take a piece of cardboard.
- Draw the outline of our future collage.
- Cut out.
- Pre-lay out the photos in the desired order.
- First we glue the elements along the contour with a slight overlap.
- We fill the interior space of the crafts with photographs.
Panel of threads and nails
To decorate the room of a young girl will help a picture in the form of a heart. You can make it with the help of threads and nails.
Important! The base can be taken from wood, cork, polystyrene or plywood.
To make a panel on the wall with your own hands in the shape of a heart, you will have to try a little.
Materials and tools:
- Hammer.
- Pins with a beautiful head or thin cloves.
- Acrylic paint.
- Pliers.
- Threads - any: iris, floss, wool.
- PVA glue.
- Scissors.
- A simple pencil.
- Paper.
Sequencing:
- Choose the basis, determine the size of the future picture.
- Paint the plane a tone lighter than the color of the threads.
- Draw a heart outline on a piece of paper that will be proportional to the size of the picture.
- Cut out.
- Attach the template to the base and circle.
- Drive cloves evenly along the contour - the smaller the distance between them, the better.
- Tie a thread to one stud.
- Pull it to the clove on the opposite side.
- Circle around him.
- Keep wrapping in any order.
- Glue beads or other decorative elements onto the base.
Button panel
In almost every house there is a jar or casket where different buttons have been stacked for years. In the end, there were so many of them that there was nowhere to go. Buttons of different sizes, colors, with arches or holes - all this can be a wonderful material for a picture that can decorate a boring wall.
The very first thing that comes to mind is the painting “Money Tree”. As a rule, it is made of coins, but they can be replaced with buttons. Although no one can forbid you to arrange buttons with coins in one panel.
Important! It is believed that such paintings bring money to the house.
Materials and tools:
- Basis - fabric stretched over a frame, cardboard, board.
- Buttons of different sizes and colors.
- Glue.
- Pencil.
- Copy paper.
Sequencing:
- On the base, apply a pattern in the form of a lush crown and a thick trunk.
- Prepare buttons of different sizes.
- Mark which button will be located.
- Apply glue to the button base and glue them one at a time, starting from the trunk.
- Stick the buttons, which will be leaves, going into the trunk, so that it is clearly visible as the “leaves” hang.
- If you don’t have a lot of buttons and there are spaces on the basis, you can paint over them with any colors.
Panel of salt dough
Salty dough is a wonderful material for modeling. Som masterpiece manufacturing process develops fine motor skills well, which is very useful for children to make a speech.
Important! Why from salt dough, and not, for example, from plasticine? After all, he also does a good workout, develops motor skills and has a large selection of color palettes. But the fact is that plasticine always remains soft, and it does not seem possible to dry, respectively - the panel can be damaged sooner or later. But the dried dough is a completely different matter: it is strong and solid.
Let's look at how to make paintings and panels with your own hands from salt dough.
Materials and tools:
- Flour - 2 cups.
- Fine salt - 1 cup.
- Unrefined vegetable oil - 1 tablespoon (instead of it you can take the same amount of dry wallpaper glue or hand cream).
- Water - 125 ml.
Important! Properly prepared dough does not stick to your hands, it should knead well, be elastic and dense. If the dough is too sticky, add a little flour, and if it sticks to your hands, add a little butter.
The dough can be made fragrant by adding different spices: black and red pepper, nutmeg, turmeric, cinnamon and more. And food colors will help to color it.

Sequencing:
- Make a picture of the finished dough or make separate figures for crafts, which will need to be assembled in the future.
- When the molding is completed, the product is put to dry in the oven at 80 degrees.
- You can also dry it on a battery, but in this case, the drying process may take 5 or more days.
- The dried painting is painted with paints.
to contents ↑Important! In order for the product from salt dough to be strong and durable, it should be varnished.
Paper panel
Paper is one of the simplest and cheapest materials. From it you can make a lot of very beautiful decorative elements for any room. This is possible not only for adults, but also for children. Read on how to make a beautiful panel on the wall with your own hands from colored paper below.
Important! This craft can be made in less than one hour, but it will decorate your home for a very long time. Against the background of such an ornament, you can take successful photos, as it is suitable for cheerful and active people.
Materials and tools:
- Colored paper.
- Paper clips.
- Scotch.
- Pins
- Stapler.
Sequencing:
- Take a paper sheet, fan it up like an accordion.
- Bend it in half.
- Using a stapler, connect its inner faces. Of these three accordions, a circle is obtained.
- Circles can be made of paper of different colors.
- Make sure that the staples are not visible on the front side - leave them only from the inside.
- Make a lot of such circles and make a picture of them on the wall.
- Secure each circle with pins.
Stock footage
We hope that we could help you figure out how to make a wall panel with your own hands. Such work provides great scope for creativity. You can make absolutely any designer decor and decorate the room with your own masterpiece. For many, such an activity can be not only a pleasure, but also a constant hobby.
- How to choose a vacuum cleaner taking into account the characteristics of the house and coatings?
- What to look for when choosing a water delivery
- How to quickly create comfort at home - tips for housewives
- How to choose the perfect TV - useful tips
- What to look for when choosing blinds
- What should be running shoes?
- What useful things can you buy in a hardware store
- Iphone 11 pro max review
- Than iPhone is better than Android smartphones
 (No ratings yet)