DIY kitchen curtains

Do-it-yourself things will never go out of fashion, but on the contrary, they will gain even more popularity. If you do not have experience in sewing, knitting and embellishment, do not rush to be upset, as there is a simple job for you. So, for example, to sew curtains to the kitchen with your own hands, you do not need much experience in cutting and sewing. Everyone knows that curtains are the last detail that gives the interior a finished look. That is why many women prefer to sew curtains on their own to create their own author’s ideas. Today we will introduce you to the main types of curtains, with their features and manufacturing techniques. From this list you can choose the most suitable option for you, the work on which you can perform.
to contents ↑Types of curtains in the kitchen
Before you sew beautiful curtains in the kitchen with your own hands, it will not hurt you to know their varieties, which differ in design, degree of complexity and features of mounting on the cornice. Here is a list of the most popular curtains:
- Hinged curtains. This is a classic version, available for the manufacture of even the most inexperienced dressmaker.
- Australian curtains. They are an easy and elegant option. Most often, the product is decorated with ruffles and frills, which rise and fall with the help of mounting braid.
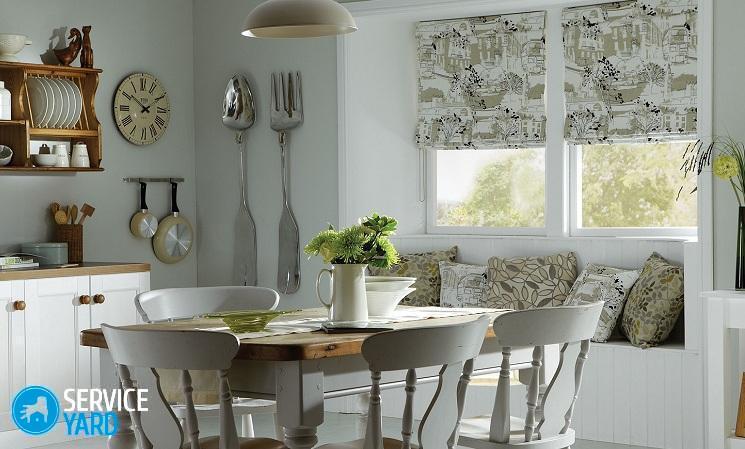
- Roman. They have a simple design - strict, flat and elegant.
Important! Making this type of jewelry requires certain sewing skills.
- French curtains. Such an attribute will make the kitchen incredibly airy, delicate and cozy.
Important! Patterns of the product are quite complicated, but understandable to an experienced craftsman who knows how to properly position the tucks to form beautiful folds. Mounting tape is also used here.
- With lambrequin. There are many patterns for sewing light curtains with lambrequin do-it-yourself. To begin with, you can start with the simplest curtains, consisting of three paintings - two side and one horizontal (under the ledge)
- Curtains on the grommets. Any housewife can sew such curtains, following some recommendations on choosing rings for lambrequins and installing them.
- Rolled (blinds). They vary in degree of difficulty. The design of such curtains is very similar to the blinds mechanism: the product can be raised up or down.
Hinged kitchen curtains
So, let's look at the step-by-step instructions for this type of curtain:
- We cut out two cuts from the main fabric.
- We cut out all other decorative details of the product from additional material. For this type of curtain, you can sew a lining - it all depends on your desire.
- We process the side seams of the panels so that they do not dissolve during use of the product.
- We sew elements of the lower design according to the “pocket” technique, and then we sew them to the main fabric.
- Fold the loops in half, sew them on the wrong side, and then twist them. Smooth the edges so that the seam is in the center of the part.
Important! On stitched textile loops, threads, bumps and so on should not be visible.
- Sew the seam loops to the main fabric.
- We sew the hooks together.Fold the material in half, sew it, twist it and carefully smooth it, observing the location of the seam in the middle of the part.
- Decorate the finished curtain with ruffles, ruffles or bows.
We got a simple but cozy thing for the kitchen!
to contents ↑How to sew lambrequin curtains in the kitchen?
You can easily sew a lambrequin curtain for your kitchen.
Important! This design of curtains is very popular among young couples seeking to equip their home in a romantic setting. Sewing a pelmet is considered a cheap, fast and beautiful option with a wide variety of performance techniques.
The list of necessary materials and tools:
- A piece of fabric equal to the width of the window opening, 60 cm high.
- Narrow satin ribbon.
- Threads in tone of fabric.
- Needle.
- Scissors.
- Sewing machine.

Step-by-step algorithm of actions:
- Iron the fabric well, and then cut it on a flat surface. We sweep the side edges, and twist the bottom edge two times to pave the future line. We sew everything on a sewing machine.
- We turn the top edge of the panel to the thickness of the cornice. Sweep it, and then grind it.
Important! This curtain does not need a lining.
- We collect the side seams of the product on a thread, while doing 5-6 small stitches.
- We hang the curtain on the ledge. Divide the satin ribbon into two strips about a meter long. We transfer the tapes through the cornice, and then tighten, thereby forming the folds we need.
- Tie the ends of the hanging ribbons on the bow.
That's all the work! DIY kitchen curtains are ready for their intended purpose!
to contents ↑We sew do-it-yourself curtains for the kitchen with eyelets
Curtain on grommets - an alternative to curtains with grommets. Eyelets are called metal or plastic edging, located on the upper edge of the fabric. It is through the grommets that the curtain is strung on the cornice.
We will prepare the necessary materials and tools:
- Fabric for sewing curtains. We calculate the material consumption according to this scheme: the length of the cornice is multiplied by 2.5.
- Finishing fabric for the cuff.
- Eyelet tape.
- An even number of eyelets.
Master class on how to sew curtains in the kitchen with your own hands:
- We cut off all unnecessary by pulling the shared thread, and then process the side seams, tucking and stitching them on a sewing machine.
- We cut one strip of 25 cm length from the finishing fabric - this will be a part for the formation of the cuff. Mark the line with chalk in the center of the strip to attach a grommet tape on top.
- Glue the tape with an iron. We bend the cuff to the previously glued side, and then iron the edges.
- Iron the seam allowance on the grommet tape, adhering to the edge of the product. Iron the second allowance on the front side of the cuff.
- We turn the ends of the cuff on the front side.
- We put the curtain in the cuff, laying it so that the glued side is on the outside. Leave the bottom roll 1-2 mm. We sew everything on a sewing machine, iron the cuff.
- We retreat from the upper edge of the cuff 3 cm, we outline the location of our grommets. We apply them to the fabric, circle their inner diameter.
- We install eyelets, snapping them with pressure.
- We collect the curtain in the "accordion", we pass the rod of the eaves, we hang and distribute the drapery with our hands over the entire width of the curtain.
The list of rules for eyelets:
- Determine in advance the distance between the grommets, since the depth of future folds depends on it. So, to create embossed folds, adhere to an interval of 20 cm, and for small ones - 15 cm.
- Constantly monitor the top indentation of the curtain, which depends on the density level of the selected material. The soft fabric will have a bend of 5 cm for making rings with a diameter of 4 cm.
to contents ↑Important! Eyelets can be installed using special punches or improvised means by cutting holes.
How to sew a Roman curtain in the kitchen with your own hands?
- We lay out the fabric on the table, mark the seam lines (folds), folds, and the attachment points of the rings from the wrong side. We make sure that the fold lines are parallel to each other, and the folds are the same in width. We process the edge of the panel using the double bending method.
- We trim and process the upper edge of the product, and then sew on Velcro to it, which will hold our curtain.
- Tuck the bottom edge with a small margin. We insert the weighting agent into a special drawstring (hole) so that our curtain not only hangs evenly, but also looks neat.
- Sew the finishing border on the wrong side (on the crease line).
- Insert the pins inside the resulting pockets. Considering the fact that before each washing we will need to pull out the pins, we leave an unshielded place on one side of the pockets.
- We fix the curtain on a wooden beam, which will serve as a cornice for this type of product.
- We pass the cords through all the rings. We make sure that we get even and equal folds.
So the sewing of the curtains for the kitchen with your own hands in the Roman style has ended!
to contents ↑General recommendations:
- Start sewing with a sketch, an idea from a magazine or the Internet. It is extremely difficult to make a curtain with your own hands without a clear and detailed pattern.
- For patchwork curtains you need to sew a lining.
- Curtains can be decorated with embroidery, applique, lace and other decorative elements.
- For sewing the simplest classic curtains, you need to have basic knowledge of sewing the constituent elements of this type of curtain.
- Choose the material according to your kitchen. So, for example, for the room where the food is prepared, you need to choose a fabric that is easy to wash and do not absorb aromas.
- When choosing fabric, consider the location of the window. On the south side, we do not recommend hanging a curtain made of bright material so that the fabric does not fade in the sun. Such bright colors are well suited for the shady side of your home.
- Before starting to sew, be sure to wash and iron the selected material, as many fabrics can shrink slightly after the first wash. If this is not done, then after cutting the cloth you can no longer affect the width and length of your future product.
Stock footage
We examined the most popular DIY curtains for kitchens. When choosing such an accessory, rely on your personal preferences and features of the style of the room. Success and good luck in needlework!


