

Attaching a stainless steel sink to the cabinet
A sink in the kitchen is just as necessary as a stove or refrigerator. There are a huge number of types of sinks, however, the most popular design is the overhead kitchen sink, the accessibility and ease of installation of which form a high demand among consumers. The operation of the overhead plumbing is not possible without the kitchen cabinet on which it is installed. In other words, the sink and the supporting table represent a single design in the interior of the kitchen. Therefore, it is very important to mount the stainless steel sink to the cabinet correctly so that washing dishes and products is comfortable and convenient. In our article, we will give an overview of the most common ways of fixing sinks on different bases, describe an algorithm for independent work.
to contents ↑Key Features of Overhead Sinks
Overhead sinks got their name due to the installation method. In fact, this is a countertop with a bowl made of various materials. Most often, stainless steel is used for the production of a kitchen sink, due to the following advantages:
- Light weight.
- Durability. Plumbing made of stainless steel is resistant to water corrosion and serves for many years without cleaning from rust and special painting.
- Hygiene The shiny surface is easily cleaned of grease.
- Affordable price. In the market, stainless steel sinks are the most inexpensive.
- Simplicity of installation and dismantle. The assembly of the sink consists in laying it on the surface of the cabinet and fixing the entire structure with self-tapping screws. To remove the sink, just unscrew the 4 plastic fasteners from the wrong side.
to contents ↑Important! The disadvantages of washing stainless steel include a low level of sound insulation in contact with water. Although, in most cases, such a disadvantage is possessed by low-quality products, in the manufacture of which only one steel sheet was used. To avoid this problem, purchase a sink with a bowl and a sufficient depth.
Device
The stainless steel surface mounted sink is a tandem of sink and kitchen cabinet without a back wall (for connecting a siphon to a drain pipe).
Despite the fact that the cabinet does not have shelves, its space is often used to store a bin, an auxiliary tool and empty bottles. The cabinet is closed by doors, and its outer surface can be made of any material and have a different color. The choice of cabinet design with a sink depends on the overall interior of the kitchen.
Important! The kitchen sink is sold both separately and complete with a cupboard. It is preferable to choose the second option in order to save yourself from the need to look for a suitable cabinet for the sink.
As for the shell itself:
- All models of overhead sinks are equipped on three sides with sides (front and sides), thanks to which the sink is installed on the cabinet.
- The rear side of the structure adjacent to the wall does not have a side, but has a raised edge to prevent water from draining onto the floor.
- The bowl shape in the overhead design is most often rectangular or square with rounded edges. This form simplifies the cleaning of the inner surface of plumbing.
- The dimensions of the side walls of the bowl are standard: from 40 to 60 cm, and the depth - from 15 to 20 cm.
- Emergency drain may be provided in the back wall of the bowl in case of overflow of the sink with water. When installing this model, the hole is connected to the main drain.
- In some models of sinks, a special grill is provided for screening large residues of food. The grate is mounted in the drain hole of the bowl and performs two functions: it prevents clogging of the drain pipe and closes the hole in the bowl as a cork.
- The surface of the bowl can be either matte or glossy. The matte version is more practical, since stains and dirt are less noticeable on the surface.
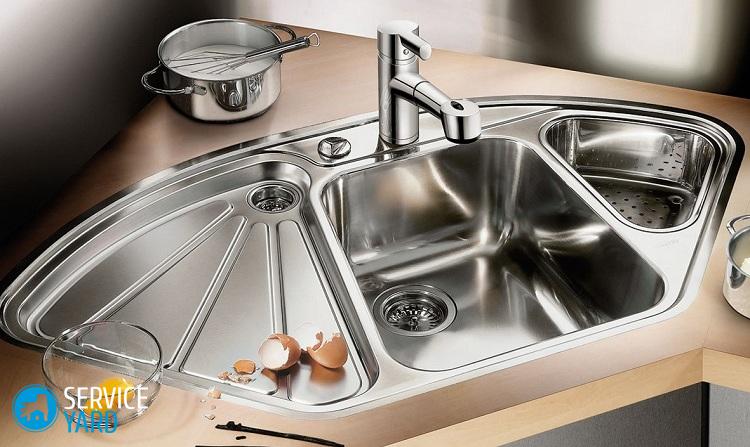
to contents ↑Important! Despite the fact that stainless steel sinks have a simple design, they can be equipped with additional elements, for example, a second smaller bowl for washing products or a special ribbed tabletop for storing wet dishes and laying out vegetables and fruits after washing. The surface of the metal countertop has small depressions and protrusions so that food and utensils do not slide off it. The ribbed tabletop can be located either to the left or to the right of the bowl.
How to assemble furniture under the sink?
The installation of a stainless steel sink on the pedestal is carried out in two stages:
- Assembly of a support curbstone.
- Installing the sink.
For work you will need the following tools and materials:
- A screwdriver or a set of screwdrivers.
- Fasteners (angles and screws).
- Pliers.
- Silicone sealant to protect the sink and cabinet from moisture.
We will consider each stage of installation of the overhead sink in more detail.
Equipment
Any cabinet furniture is supplied unassembled. Fasteners are included with the furniture, so it’s not difficult to assemble a cabinet and mount the stainless steel sink with your own hands.
The body parts of the support pedestal are sawn rectangles from a chipboard sheet. All parts have standard sizes, and the edges have already been processed. The following details are included in the package of a curbstone:
- Sidewalls - 2 pcs.
- Bottom.
- Doors - 2 pcs.
- Cross levels for ensuring rigidity (drawers) - 3 pieces. The drawbars are located between the side walls in the following places: under the bottom (front bottom), under the sink (front top) and back in the middle.
- Accessories (hinges and handles).
- Fasteners.
Step-by-step instruction:
- Disassemble the packaging, remove the packaging material and lay out all the parts. Check the compliance of the component parts with the assembly instructions.
- Connect the side walls and front legs with the help of corners and screws. First install the lower drawer, and then - the upper. Screw them to each sidewall in the corners.
- Connect the resulting structure to the bottom so that the bottom edge lies on top of the lower front drawer. Attach a bottom to each sidewall and to the lower front side of the drawer.
- Install the rear drawer by attaching it with the corners to the side walls of the structure in the middle.
to contents ↑Important! Doors hang on a curbstone only after installation of a sink.
How to fix a stainless steel sink on a pedestal?
There are several ways to fix the sink on the cabinet:
- With sealant. Apply sealant to the edges of the cabinet and install a sink on top.
Important! Sealant, although it combines two functions - protective and fixing, but the reliability of the attachment is doubtful, since the sink must withstand considerable weight loads.
- Foam. This method is very simple. Foam is applied to the edges of the side and front walls of the cabinet, after 10 minutes a sink is installed. After the foam dries, the excess is cut off.
Important! Although the foam has a large adhesive strength, but, in fact, the sink lies only on the walls of the cabinet, so the reliability of this design is questionable.
- On special L-shaped mounts.If the kit includes special mounting brackets, then the installation of plumbing will be of better quality, reliable, durable and strong.

How to fix a stainless steel sink to the cabinet with fasteners?
Step-by-step instruction:
- On the inside of the cabinet, mark the places under the fasteners with a pencil.
- Screw the screws into the marked places (not all the way).
- Fix the brackets on the screws.
- Install the sink into the grooves of the fasteners. Check to see if she lies flat in the space allotted to her.
- Remove the sink, turn it upside down.
- Apply sealant to the ends of the side walls.
- Coat the perimeter of the sink with silicone sealant.
- Insert the bowl into the grooves of the brackets.
- Screw the sink inside with screws.
- If silicone protrudes from under the edge of the sink, remove it with a wet cloth.
- Connect the water supply. Use flexible connecting hoses that make it possible to move the sink from the wall for easy installation. Connect the siphon to the drain pipe, connect the flexible hoses from the mixer to a source of hot and cold water.
- Hang the doors on the pedestal. To install the doors evenly, first fasten the hinges to the doors, then attach them to the side wall and use chalk to mark the locations of the hinges and their holes on the sides. Tighten the doors in turn, checking the coincidence of the marked location of the hinges.
Advice:
- Install an overhead sink with a mixer and siphon already mounted on it, since after installation it will be difficult to do.
- To connect water supply use pipes made of metal-plastic. They are reliable, flexible and durable.
- You can fix the surface wash with a slide method. In this case, the cabinet should be equipped with guides, and the sink should have special curved edges. The installation of such a model is quite simple - insert the sufficiently curved elements of the sink into the guide cabinets and push it all the way.
How to fix a stainless steel sink to a countertop?
The process of installing the sink in the countertop should be carried out as follows.
Step number 1. Footprint Contouring
First of all, it is necessary to prepare a place for future washing. To do this, lay the sink itself on the surface of the countertop or make a template from the dense material according to the shape of the purchased sink, leaving 1-2 cm allowances, try it on the countertop. According to the template, mark with a marker.
Important! It is much more convenient to work on a countertop laid with the wrong side up.
Step number 2. Designing the landing zone
First you need to protect the countertop from scratches and other damage. To do this, cover the space around the intended hole with masking tape.
Using a jigsaw, make a hole for the sink as follows:
- Drill the starting points of cutting (2 mm), connect them with a chisel, turning into a gap.
- Saw the grooves with a jigsaw, observing the perpendicularity of the cut.
- Rasp the edges of the hole and remove large burrs.
- Apply sealant to the cut to prevent the wood from swelling on contact with water.
- If you previously dismantled the countertop, then return it to its place. Stick a butyl tape around the perimeter of the hole.
Step number 3. Washing installation
- Install the sink in the hole so that at least 10 mm of the side come into the whole area of the countertop.
- Squeeze the sink.
- Fix the sink from the wrong side using standard fasteners. For installation on thin countertops, additionally use wooden blocks.
- Treat all joints between the sink and the countertop with silicone.
- Remove excess sealant with a clean rag or wet cloth.
- Allow the train 10-12 hours to gain a foothold and connect the water supply and sewer.
Important! The joint can be sealed with either silicone or a self-expanding tape.
The method described above, how to fix the stainless steel sink to the countertop, is suitable for kitchen sets made of MDF or wood.Structures made of natural or artificial stone must be treated with a special professional tool. In this case, the installation should be carried out by specialists.
to contents ↑Stock footage
We hope that our information has helped you install a sink on the cabinet or countertop. Adhere to the rules of operation of plumbing from stainless steel, and it will serve you for many years!
- How to choose a vacuum cleaner taking into account the characteristics of the house and coatings?
- What to look for when choosing a water delivery
- How to quickly create comfort at home - tips for housewives
- How to choose the perfect TV - useful tips
- What to look for when choosing blinds
- What should be running shoes?
- What useful things can you buy in a hardware store
- Iphone 11 pro max review
- Than iPhone is better than Android smartphones
 (No ratings yet)