

Installing a wall socket in a concrete wall
To safely connect all the necessary electrical appliances in the home, you need sockets, moreover, of appropriate quality, characteristics. Installing the outlet in a concrete wall - this process cannot be called simple. Here you need not only the desire to do something yourself, but also certain knowledge. This article is a detailed instruction for installing the outlet in a concrete wall and securing it.
to contents ↑Tools and Supplies
Before installing sockets in a concrete wall, prepare such tools and materials:
- The drill (8 mm) with a nozzle shovel.
- Perforator with a crown.
- Primer.
- Putty.
- For marking: tape measure, pencil, building level.
Markup
Mark with a pencil the axial center of the outlet location. If you have planned to install the outlet block in a concrete wall, then you must observe the distance from the marking of the previous outlet (the center distance between the sockets on average is 71 mm).
Draw 2 axes: vertical and horizontal.
to contents ↑Important! Draw lines of sufficient length to have clear guidelines for the smooth installation of the sockets.
Hole making
This stage is rightfully considered the most difficult. Not only precision and mastery of the instrument will be required, but also physical strength:
- First drill a hole in the center of 50-60 mm deep at the intended center.
- After that, use the crown nozzle and mark the dimensions of the future hole.
- To make it easier to work, make 10-12 holes in the marked circle with a drill.
- Then use a perforator with a crown - a 5-centimeter recess for the outlet is enough.
Wiring
This is the next step after cutting the recess. The best option when each outlet is powered by a separate electric cable.
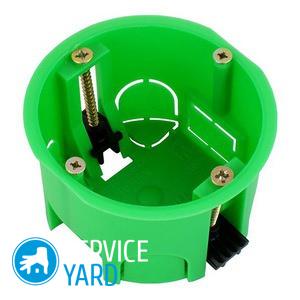
to contents ↑Glass for a wall outlet in a concrete wall - preparation and fixing
If cutting a recess in concrete requires physical effort, then working with the sockets can be classified as “jewelry”. Proceed in this order:
- Prepare for installation of the socket. Remove the connectors and plugs.
- Try on the socket to the prepared recess.
Important! Make sure that the undersocket is sitting perfectly straight, not bulging, not tilted to the side.
- After you have made sure that the sockets are level, proceed with the installation. Remove dust from the wall, apply a primer coat. In this case, the design will be as reliable as possible. Wait until the primer coat is completely dry.
- Put putty or gypsum mixture inside the cut hole. You can use the usual alabaster.
Important! Work very fast as gypsum freezes very quickly.
- Insert into the gypsum mixture the socket, into which the cable passes. In this case, focus on the axial lines of the marking. Set the wall socket flush with the wall.
to contents ↑Important! If a mixture has got into the socket, do not rush to remove it immediately. It is much easier to remove it when the composition completely hardens.
Finishing work
Finishing can begin after the mixture has set. There is no need to rush, as you run the risk of displacing the rosettes:
- Prime the sockets.
- Plaster all ditches, chips and cracks. Coat the undergrowths more thoroughly.
- Wait until the base coat is completely dry and plaster the wall white.
Important! When working with outlets, turn off the power to the apartment. The best option is to turn off the desired circuit breaker on the electrical panel.
Different types of sockets are mounted in different ways. Consider in detail the installation process of a structure equipped with spring terminals:
- Prepare the wires, strip them 1.0-1.2 cm. Align the wires so that they resemble splayed cat's claws.
- Insert the wires into the terminal. Zero (blue) to the left terminal, white (phase) to the right. Insert the yellow-green wire into the terminal in the center.
- Install the structure inside the socket, align with the building level.
- Mount the frame and front panel - this is the easiest moment.
Stock footage
Installing a wall outlet in concrete is not very difficult, but it requires accuracy and scrupulousness. If you did everything correctly, the device will work perfectly.
- How to choose a vacuum cleaner taking into account the characteristics of the house and coatings?
- What to look for when choosing a water delivery
- How to quickly create comfort at home - tips for housewives
- How to choose the perfect TV - useful tips
- What to look for when choosing blinds
- What should be running shoes?
- What useful things can you buy in a hardware store
- Iphone 11 pro max review
- Than iPhone is better than Android smartphones
 (No ratings yet)