How to seal an electric kettle?
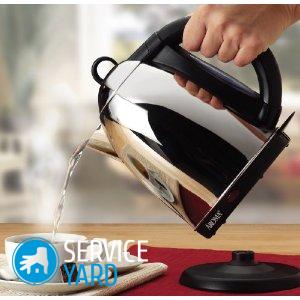
One of the irreplaceable assistants in the house was an electric kettle, because with its help it is very convenient to warm water in the morning for coffee or tea and not think that you will forget to turn it off in a hurry. But as with every electrical equipment, breakdowns occur with kettles, and everything starts off quite harmlessly - with a small puddle near the appliance that grows every day, and then the question arises: how to seal an electric kettle? A faulty device cannot be called safe for humans, and if measures are not taken in a timely manner, a whole lake will form in the kitchen and the kettle will finally break. Therefore, in this article we will tell you how and how to seal an electric kettle.
to contents ↑Electric kettle leaking - what to do?
Reasons for the electric kettle to leak during heating may be:
- Cracked case. In this case, it is best to go for a new device.
- Damaged bottom. A similar problem often arises in metal devices, since due to corrosion at the junction of the bottom with the body, a gap forms - water flows from it. Such a breakdown cannot be repaired.
- Crack on the water level indicator.
- Weak mounts.
- Damaged O-ring on the heater.
Consider how to repair a kettle with your own hands.
Crack on the water level indicator
To determine this failure, disassemble the roof of the device, because your task is to get to the indicator and study it. It is necessary to check the indicator not only for cracks, but also to determine if there are leaking connections.
If you have a plastic device, then the indicator can be presented in the form of the same plastic tube, which quite often dries up, and breaks at the bend. Replace the indicator does not work, but there is a way out - shut off the fluid in the tube with the screw. The kettle will boil water perfectly, the problem that the electric kettle is flowing will be solved, but the device will no longer show the water level.
Weak mounts
Take a closer look at the heating element - if it hangs, then you need to attach it more firmly to the wall of the kettle to solve the problem that the electric kettle is flowing. Tighten the bolts and check the result. For this:
- Pour water into the kettle.
- Place the device on a paper towel or newspaper:
- If the paper is dry, then the problem is resolved.
- If water still collects around the kettle, check the integrity of the rubber gasket.

O-ring replacement
It is only necessary to start repair yourself if the warranty period has expired or the kettle was purchased without a warranty. It is possible to independently decide how to glue an electric kettle or what to do if it flows, even if the device cannot be delivered to a service center.
We offer the following instructions for replacing a sealing ring on a heating element:
- Remove the bottom of the electric kettle. On some models, the bottom is fixed with three screws - using a Phillips screwdriver, unscrew them. On other models - options are possible, so proceed according to the instructions for the device.
- Pull out the disc with the pad. If the kettle is disk, then the heating element is simply inserted into the housing. Tightness in this case provides a heat-resistant silicone gasket. The same gasket also holds the disk.
- Remove the gasket from the disc.Carefully inspect the gasket, disc, and housing:
- If there is a defect in the case (chip, crack), then further repair is impractical.
- If there is no through rust on the disk, then we proceed to the study of the o-ring. If the defect is on the disk, then it will need to be replaced.
- In case of obvious defects in the seal, replace it. If everything is in order, then it is possible that during operation the connection between the disk and the case was weakened (it moved down).
- Wipe the gasket, disc and housing from scale and limescale.
- Replace the o-ring.
- Insert the disc all the way into the case.
- Replace the bottom.
- Fasten the bottom with self-tapping screws, but without unnecessary zeal, do not overtighten.
- Pour water into the kettle.
- Connect the device to a network and boil water.
- Check the kettle for fluidity - if everything is in order, the device is ready for use.
Helpful hints:
- If the new electric kettle flows a little, then wait a while (a week or two), possibly the scum will tighten the microcrack.
- To prevent the kettle from dripping, descale it regularly and use filtered water as long as possible. Then the heating element will work longer and better, and the sealing gasket will be preserved.
Although the choice of household appliances on the market is huge, but if you want to repair an old kettle that is very convenient for you, then check out the simple steps to repair your equipment with your own hands.
to contents ↑The principle of operation of the electric kettle
The device of an electric kettle, even in expensive models, is not complicated and does not differ in originality:
- The heating element located in the lower part of the housing, when electricity is supplied, heats the water.
- The heater itself is connected to a temperature regulator.
- As soon as the temperature reaches the set value, the kettle is disconnected from the network.
- For ease of use, an LED bulb is connected to the external circuit circuit, which indicates that the device is working.
Electrical appliances must always have a thermal fuse that will open the circuit, for example, when overheating, or in case you forget to pour water into the kettle.
The circuit diagram of an electric kettle itself is not complicated and is similar to a circuit of an iron. The device does not have many parts that can break. The most difficult part is the temperature controller, because its device depends on the specific model. If the thermostat breaks down, it is not repaired, but replaced with a new one. Other malfunctions can be eliminated at home.
Repair sequence:
- First, check the cord with the stand. Make sure that voltage is supplied to the device. Ring the contacts with a multimeter and, if necessary, solder the contacts in the stand. If the contact group has melted, then it is no longer possible to fix anything.
- If the cord and stand are in order, check the ring contacts on the kettle. Press the “On” button and if there is no signal, unscrew the bottom of the device, check all the contacts inside. A broken temperature sensor or heating element will have to be replaced.
- Check the auto power off button. It is located on the handle. Due to the oxidation of the contacts, this part very often fails. Strip the contacts with sandpaper, if necessary, and the device will work.
Advice:
- For modern models of dummies, the hardest thing is to get to the on and off button if it needs to be fixed. Remove the cover and unscrew the bolts that are at the top and bottom of the handle. Do everything carefully and carefully so as not to damage the plastic parts. Replace the LED bulb at the same time if it does not light.
- If the kettle shuts off ahead of time, then in this case, do not disassemble the device completely, because the whole thing is in scale, and not in breakage.Use citric acid to clean the device: dissolve a bag of citric acid in 0.5 liter of water and pour it into the kettle, then turn on the device with the lid open. Repeat if necessary.
to contents ↑Important! If your electric kettle cannot be repaired, and you will soon go to the store for a new appliance, we suggest you find out the best models in our review, as well as pay attention to an alternative to the kettle that is gaining popularity:
Stock footage
We hope that in the article we answered the question: how to glue the electric kettle, as you can see - glue will not help here. First determine the cause of the leak, and then, following the tips and tricks, proceed with the action. A self-repaired device will be even more expensive and closer to you. Have a nice tea party!


