

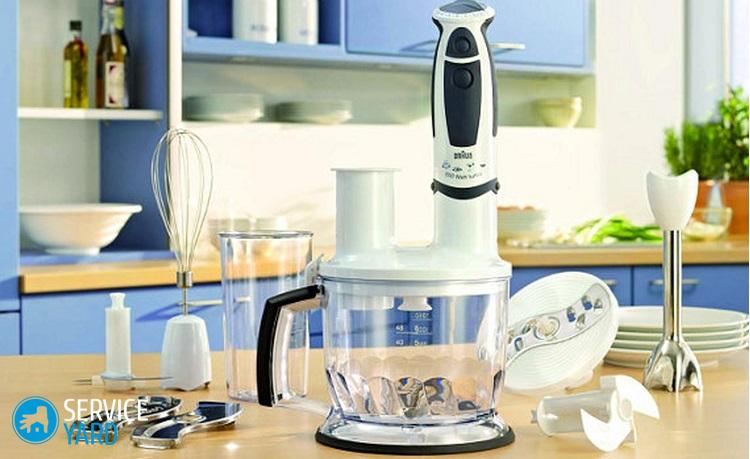
How to disassemble a blender Brown?

A blender is an integral component of every kitchen, it is able to mix, grind, whip anything. In order for it to always work perfectly, it needs to be cleaned from time to time, but how to disassemble the Brown blender? To deal with this issue, you must also know why you are disassembling, how to repair it, and should have an idea of the main problems with the blender. This will be discussed in this article.
to contents ↑Tool preparation
In order for you to be able to disassemble the Brown blender with your own hands, you will need such tools:
- pliers;
- a thin, narrow knife or a thin and flat screwdriver;
- flat and long screwdriver;
- glue intended for aircraft models or superglue;
- hammer.
Work sequence
To properly disassemble the Brown blender and not damage its important parts, proceed according to this algorithm:
- Using pliers, remove the nozzle holder, also called a cartridge.
- Take a thin and narrow knife or a screwdriver, insert the tool between the casing and the body, and with a light blow of the hammer knock out the weld.
- Repeat this action along the housing perimeter until the motor with the casing move freely inside the housing. Be extremely careful near the locks - under no circumstances should you beat them back. Also, do not use a wide knife or a thick screwdriver, because the whole thin external case may burst.
- Then drown the clamps and remove the engine.
- The engine itself can be pulled along with the control board itself. In the event that this does not happen, use the pliers to pull the edge of the board - thanks to this, it is quite easy to remove.
- Inside you will notice 4 latches from the back cover. Bend these latches along the arrows, as a result - the top cover will be in your hands.
- Use a screwdriver to pry off the speed cap. Bend all external latches of the network cable holder from the inside.
Important! Be careful with the board, because it is fragile enough.

Major faults and design
This device is quite simple throughout its structure. Basically, a blender consists of such components as: an electric motor, a nozzle and a bowl, but only a stationary blender has it.
But the blenders themselves are divided into two types:
- Manual, they are also submersible - the models from Bimatek BL, Krups, Kenwood, Orion are considered the best.
- Stationary - popular options are presented by the brands Gorenje, Moulinex, Panasonic, Zelmer.
Important! Hand blenders are a motor together with a handle to which a nozzle is attached. The key difference between a hand blender and a stationary blender is how they work:
- Food is placed in a stationary bowl, which is ground with knives, which are located at the bottom of the bowl itself.
- The manual one is directly immersed in the container - quite often it is a special glass, and cuts everything at any level.

Basic equipment malfunctions
Faults can occur in any model of equipment, but since far from many can afford very expensive options, often on the forums there are questions about how to disassemble the Brown blender and what problems it may have.
The device does not rotate
This problem lies in the knife speed switch.
The blender does not chop or malfunction
In the blender, as well as the mixer, the power of the work plays a very important role. If you have chosen an insufficiently powerful or high-quality type, the efficiency of work will be low by itself.
The device does not respond to a network connection
It is likely that something is stuck inside the chopper or the engine burned out due to overly intensive work. In some cases, a decrease in voltage in the entire electrical network is thus affected.
Modes do not switch.
Most likely, this is a drive problem or a control system.

Knives broke
The most common problem. These parts from the blender can be purchased at almost any of the Redmond RHB, Vitek, Scarlett, Braun, and so on branded stores. It is impossible to repair them in any way, which is why a replacement is being carried out.
The device does not want to turn on
If the gearbox is faulty, the device most often simply does not turn on - it is extremely difficult to carry out such a repair of the Brown blender yourself. Engine replacement instruction:
- You must disassemble the device according to the scheme described above.
- Be sure to read the manufacturer's recommendations, as well as the technical specifications of this device.
- Check the power button, as well as the lock - perhaps the problem lies in it. If you hear a buzzing sound when you turn on the blender on the network, then you must squeeze the contacts and then test them with a multimeter. In some cases, they cannot close when turned on.
- Separately, engines can be purchased in specialized stores, but such spare parts are sold separately only for expensive models or for food processors such as Kenwood HBM, DEX DHB, Polaris PHB, Gastrorag.
- Install the new engine in place of the broken one, assemble and check the entire system.
Important! In models that are non-separable, such repair is impractical, because of its high cost.

Blender repair manual
Disassemble the device before repairing it. We must immediately warn you that disassembling the Saturn, Bork and Vitek hand blenders is impossible. Usually their design is molded plastic, and a plastic ring is soldered into the base, which cannot be removed.
Therefore, you have only 2 options to solve the problem, in case the device breaks:
- Immediately purchase a new one. Unfortunately, not every service center can provide warranty repairs for such blenders.
- Solder the panel itself. In order to connect the housing, plastic soldering technologies are used, as a result of which disassembly can be carried out using high-temperature technology. Carefully cut the case and insert into the cut several small metal plates or needles. Heat them and remove the molten plastic. After the repair is completed, the plastic can be glued again.
Important! In the housing itself is the entire working part of the blender, namely: the engine, spindle, and also the control unit. This block is a diagram that helps to configure all modes and options. After disassembling, you can replace all the necessary parts with working ones or clean the contacts of your device.
Analysis of a stationary blender
A little more complicated is the case in disassembling a stationary blender. It consists of a bowl of a special shape, often cylindrical or trapezoidal, shaft, knife, electric motor, as well as a spindle.
When the device is connected to the network itself, the shaft, together with the spindle, transmits torque to the knife, which plays the role of moving and chopping products inside the bowl. In order that the ground food does not fall out through the expanded top, the bowl is covered with a lid.
Important! The rotation of the knife in some blenders can take some time - for some models of Polaris, Mulineks and Redmond firms, a special timer is built into the system, or until the moment the contacts open.
In order to disassemble such a blender, you need a screwdriver or a wrench - it all depends on the type of fasteners:
- The housing cover is fastened with screws or nuts, mainly with left-hand thread.Unscrew them, and remove the housing.
- Under it are the engine, shaft, spindle.
- First of all, inspect the shaft, in no case should there be nicks, obvious irregularities.
- Further, if necessary, you can change the knife. In the event that your knife is dull, then you will not be able to sharpen it. But you can buy it in a company store. To remove the old knife, unscrew it from the spindle.
- In some cases, the knife is not mounted on the thread itself, but on the nuts. In this case, unscrew them, and carefully remove the knife, blade from the slot.
to contents ↑Important! An oil seal is located at the junction of the knife with the drive - it plays the role of a sealant, which significantly improves the adhesion of parts, and also increases torque. This stuffing box must be changed every six months, of course, if the model is collapsible.
Stock footage
We hope, following our instructions, you were able to not only disassemble the blender, but also to identify its problem and even fix it. But if you have no idea about repairing household appliances, do not risk it - take the device better to the master so that he corrects the situation. Otherwise - with your actions you can only achieve that a valuable device will completely fail and you will have to buy a new one.
- How to choose a vacuum cleaner taking into account the characteristics of the house and coatings?
- What to look for when choosing a water delivery
- How to quickly create comfort at home - tips for housewives
- How to choose the perfect TV - useful tips
- What to look for when choosing blinds
- What should be running shoes?
- What useful things can you buy in a hardware store
- Iphone 11 pro max review
- Than iPhone is better than Android smartphones
 (No ratings yet)