How to disassemble a Samsung vacuum cleaner?

If your Samsung vacuum cleaner during its operation began to make strange, uncharacteristic sounds or poorly sucks garbage during cleaning, this is a signal that it should be disassembled and at least cleaned. How to disassemble a Samsung vacuum cleaner correctly, without deplorable consequences for equipment and its owner, we will talk in this article.
to contents ↑Disassembly tools
To disassemble the device quickly and without breakdowns, it is necessary to prepare in advance the tools with which you will complete the process. To do this, you will need:
- Pliers.
- Screwdriver for small screws.
- Screwdriver for large screws.
- Flat-head screwdriver.
- Lubricant (may be needed to lubricate the engine).
to contents ↑Important! Before you begin any disassembly operations with the household unit, be sure to disconnect the vacuum cleaner from the power supply.
How to disassemble a Samsung vacuum cleaner?
- First of all, disconnect the hose from the body - you will not need this part and will only interfere in subsequent actions.
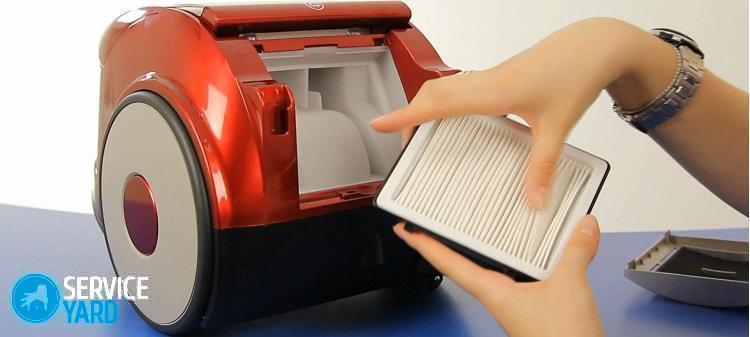
- Remove the waste container.
- Remove the main and rear filters.
Important! The waste bin and filter must be washed under running water.
- Using a Phillips screwdriver, unscrew all the bolts under the cassette container.
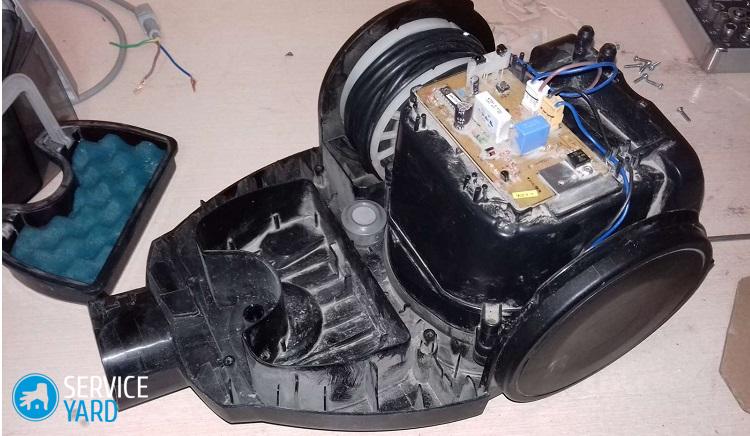
- Carefully lift the housing, starting from its front, and with a smooth movement directed upwards, remove it from the design of the vacuum cleaner.
Important! Pay attention to the presence of dust on the inside of the housing and the engine. If it is, then remove the dust with a dry cloth and brush.
But did you even know what dust is and where it comes from. We hope you are interested in our review. “Why is there a lot of dust in the apartment?”.
How to disassemble a motor in a Samsung vacuum cleaner?
Sometimes it is necessary to disassemble not only the dust collector case, but also the “heart” of the vacuum cleaner in order to understand the cause of the device malfunction or breakdown. This can also be done independently, using all the same tools.
Important! In order not to lose the screws, they can be screwed into the same connectors immediately after disconnecting the parts. Then you will know exactly where the bolt was originally located.
Procedure:
- Remove the motor bolts located on the top.
- You can remove the device only by completely freeing it from wires attached around the perimeter. To do this, carefully disconnect the connectors.
Important! Before disassembling the Samsung vacuum cleaner and removing the engine from the general design, make sure that the equipment is inactive, all the connectors are disconnected, and the wires are not tangled in the separate parts of the device that protrude.
- Disconnect the rubber o-ring, which is located on the bottom of the motor and bolted.
Important! During disassembly, always check for dust on the parts and be sure to remove it if necessary.
- Please note that the motor housing consists of two halves. To disassemble it, use a flat-head screwdriver. Carefully inserting a screwdriver into the lumen, you must slowly walk around the perimeter, prying the upper half. After such manipulations, you can remove the motor itself, which is located in a small plastic container.
- In a similar manner, use a flat-head screwdriver to remove the motor cover.
- Using the socket head, disconnect the turbine.
- Loosen the two screws and the end screws on the brushes.
- Now the last step remains - to remove the anchor from the engine.
Important! The vacuum cleaner and engine must be assembled after cleaning in the reverse order.
A few words about cleaning the device to remove dust and debris:
- Samsung dust cleaner parts are cleaned primarily with a soft brush and a dry cloth.
Important! You can use a dry paint brush for these purposes.
- Some elements, such as a plastic case, filters, a garbage container can be treated with soapy water and clean running water.
Important! After contact with water, be sure to thoroughly dry all the elements before installing them in their place.
- So that in the future it was less necessary to disassemble equipment, and it was much more comfortable to live in your house, make it a rule to use dust products and regularly follow all recommendations wet cleaning of the apartment.
Stock footage
As you can see, disassembling a Samsung vacuum cleaner is not particularly difficult. The main thing is to find all the connecting bolts and unscrew them, otherwise you risk damaging the plastic elements. But sometimes it’s still not worth doing an independent repair or cleaning of the dust collection unit, but seek the help of a specialist. Then you will definitely be properly disassembled and assembled and cleaned qualitatively.
 (No ratings yet)