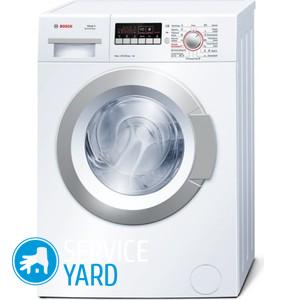
Replacing the gum on the washing machine
There are many details in the washing equipment to which the average user attaches little importance. Powder tray, drum, drain, control panel - this is usually limited to knowledge. But there are seemingly insignificant and small details, without which a complete failure of the equipment from work is possible. For example, a washing machine cannot work without a rubber band. It is thanks to her that water from the tank does not flow out during the washing process. For some reason, damage may appear on the rubber, which will not affect the operation of the device in the best way. In this case, you should think about how the gum is replaced on the washing machine and perform it.
to contents ↑Cuff Wear Reasons
Before figuring out what to do if the gum in the washing machine breaks between the drum and the door, consider the reasons that can lead to this:
- Natural wear - any rubber eventually becomes dilapidated;
- Fungus, infectious material - most often this is due to negligence of the user and non-compliance with recommendations forwashing machine care and prevention;
- Aggressive substances added during washing, which lead to friability of rubber - any modern detergents are saturated to one extent or another;
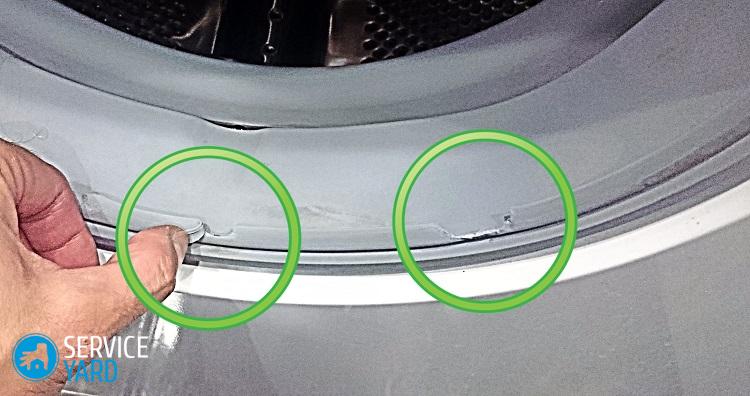
- Abrasion on the body.
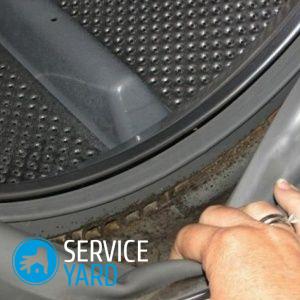
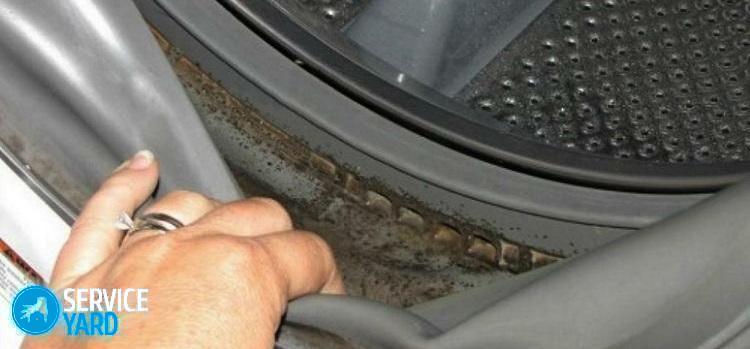
It is very easy to determine that replacement of the cuff of the hatch of the LG washing machine is required - the floor near the device will be covered with water during washing or the hatch will not close, respectively - there will be no blocking of the door and the duty cycle for the selected program.
to contents ↑Important! Depending on how complex the design of the machine is, it will take from a quarter to one and a half hours to replace the cuff.
Change the gum
Before removing the cuff of the hatch of the washing machine, a new one is bought, exactly the same as the one that suffered. It should be made of flexible and soft rubber.
Important! Before starting repair work, the washing machine must be disconnected from the network.
Such a repair will require a very small set of tools, consisting of a socket wrench and a flat screwdriver.
Important! Those who rarely encounter such work, it is better to take a photo of all the stages, then to collect the washer in normal working condition.
We remove the first collar
Replacing the cuff of the hatch of the Samsung washing machine begins with a fairly simple step - removing the first clamp. It is designed to hold the bent portion of the cuff in the front groove. This part can be plastic or spring:
- A screw is loosened to remove the spring clip. You can also tighten the spring with a screwdriver.
- A plastic clamp extends toward itself at the location of the latches.
Important! After removing the clamp, the edge of the gum bends freely, it is pulled together from the nozzle of the dispenser, which is located at the top of the machine.
We remove the second collar
The purpose of this inner clamp is to clamp the cuff. In different models, this stage may vary. Two options are possible:
- The bottom panel is unscrewed and removed, a hand is pushed from below.
- The entire front panel is removed along with the hatch.
Important! Do not accidentally drop the panel, as you may damage your leg or scratch such an important part.
After removing this clamp, locate the special mark. It is an indicator of the correct position of the cuff. It is presented in the form of a small triangle, which is on the elastic band and on the tank of the washing machine. When installing, they need to be combined.
Important! If the sealing rubber in the washing machine is not replaced correctly, there will be a violation of the sealing and the drainage system.
The grooves that are freed after removing the parts must be wiped, remove plaque and dirt from them.
Install new tires
Replacing the gum on the washing machine begins with lubricating the grooves with detergent. Its surface should become slippery to make installation easier:
- The diameter of the cuff on one side is larger than on the other. The first step is to insert the part that has a larger diameter.
Important! Be sure to check the marks on the tank and rubber. They need to be combined.
- After installing the rubber, the rear clamp is installed. It should be fixed and hold the cuff.
- All removed parts are returned to the places, the front panel is installed last.
- The rubber band for the washing machine is pulled slightly and the nozzle is tucked into the hole.
- The side with the smaller diameter is pulled to the edge located in front, and carefully refilled.
- The front clamp is the last to be installed.
Important! In addition to the gum, the heater and the control module of the washing machine often suffer, which prematurely fail due to poor water and power surges. These problems can be solved without much effort by preliminary measures:

Health test
After returning to the place of the cuff and fixing it with two clamps, the washing machine is checked for leaks:
- The device starts in rinse;
- Three minutes later, the water drains;
- The machine leans a little and checks the floor and the cuff itself.
to contents ↑Important! Another measure to prevent breakdown of the SMA is to prevent imbalance and excessive vibration. To do this, it is enough to set the equipment according to the level when connecting and use anti-vibration stands.
Stock footage
If all work is carried out correctly, there will be no traces of water anywhere. So - you were able to master at least a small, but still repair the washing machine. As you can see, this is not so difficult to do, and it is not always necessary to contact the service center, spending not extra money.
 (No ratings yet)